Welcome to Your AI Brand Shoot
Thank you for choosing one of my packages. You’ve just saved yourself a pile of money and time, and now we get to make something that actually works for your brand. I’m genuinely excited to do this with you. You’ll get photos (and maybe a video, depending on your package) that look sharp, professional, and custom-made — because they are.
This is not just “drop a selfie into an app.” I’m a real photographer who uses AI as a camera, and I’ll guide it to create visuals that actually match your brand. All the examples on this site? They’re AI photos of me. If I trust it for my own brand, I know you can trust it for yours.
Alright, here’s how this works.
Watch this short video first. It explains exactly how the process goes, what you need to prepare, and how to make your life easier. Don’t skip it. It’ll save us both headaches.
Step 0: Watch the Video
Step 1: Think About What You Want
Before you fill in the form, take a moment to think about your brand and what kind of photos you need. This doesn’t have to be complicated — in fact, keep it simple.
What’s the vibe? Casual, business, sporty, lifestyle?
Where do you want to be? Neutral backdrops, sleek offices, urban streets, cozy café corners — or leave it up to me.
What’s your style? Colors, outfits, accessories
(headphones, laptop, notebooks, whatever screams “you”).
What do you want people to feel? Approachable, professional, fun, ambitious?
Don’t overthink it. Just have a rough idea. You can always leave things to me if you’re not sure — but the more you tell me, the more I can fine-tune the results.
Step 2: Prepare Your Images
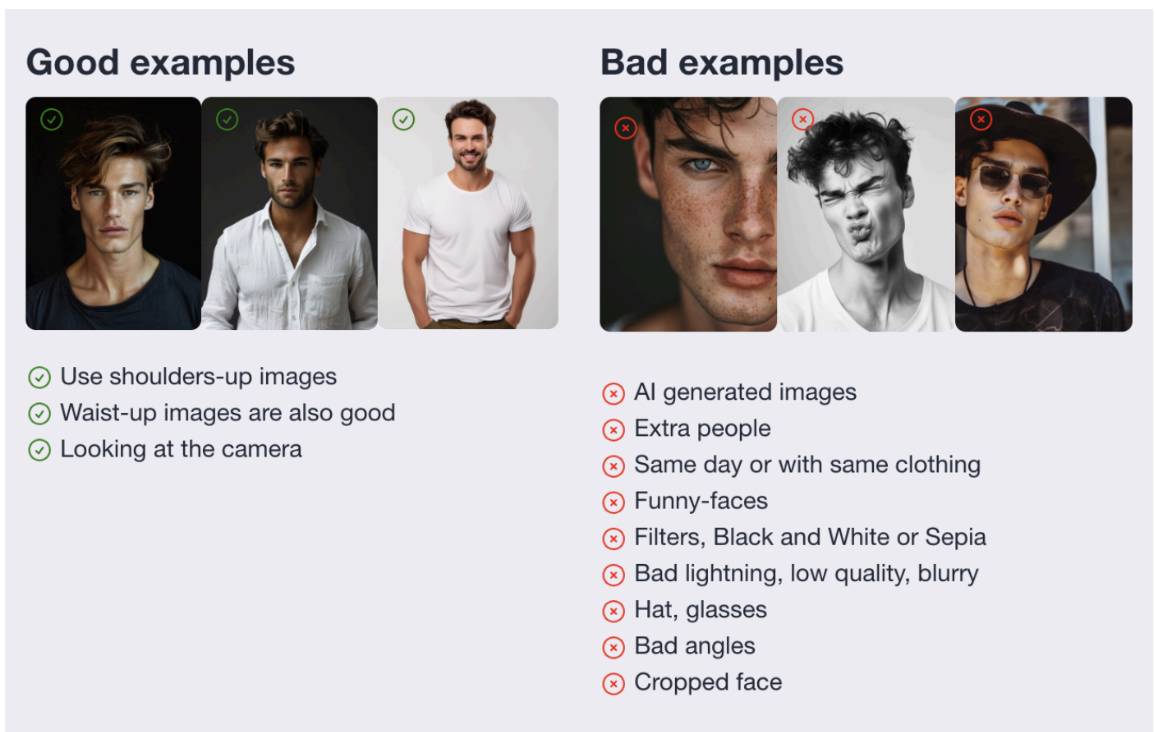
To create the best results, I need reference photos. Here’s the quick guide
(full details are in the video):
10–20 selfies or photos of you.
Good quality (your phone camera is enough).
Different angles (front, side, three-quarter).
Taken on different days and times — so the AI understands how your face really looks.
Neutral backgrounds work best.
Got past professional photos? Even better. Mix them in.
The rule is simple: better input = better output.
Step 3: Prepare a Pinterest Board link (or other image link)
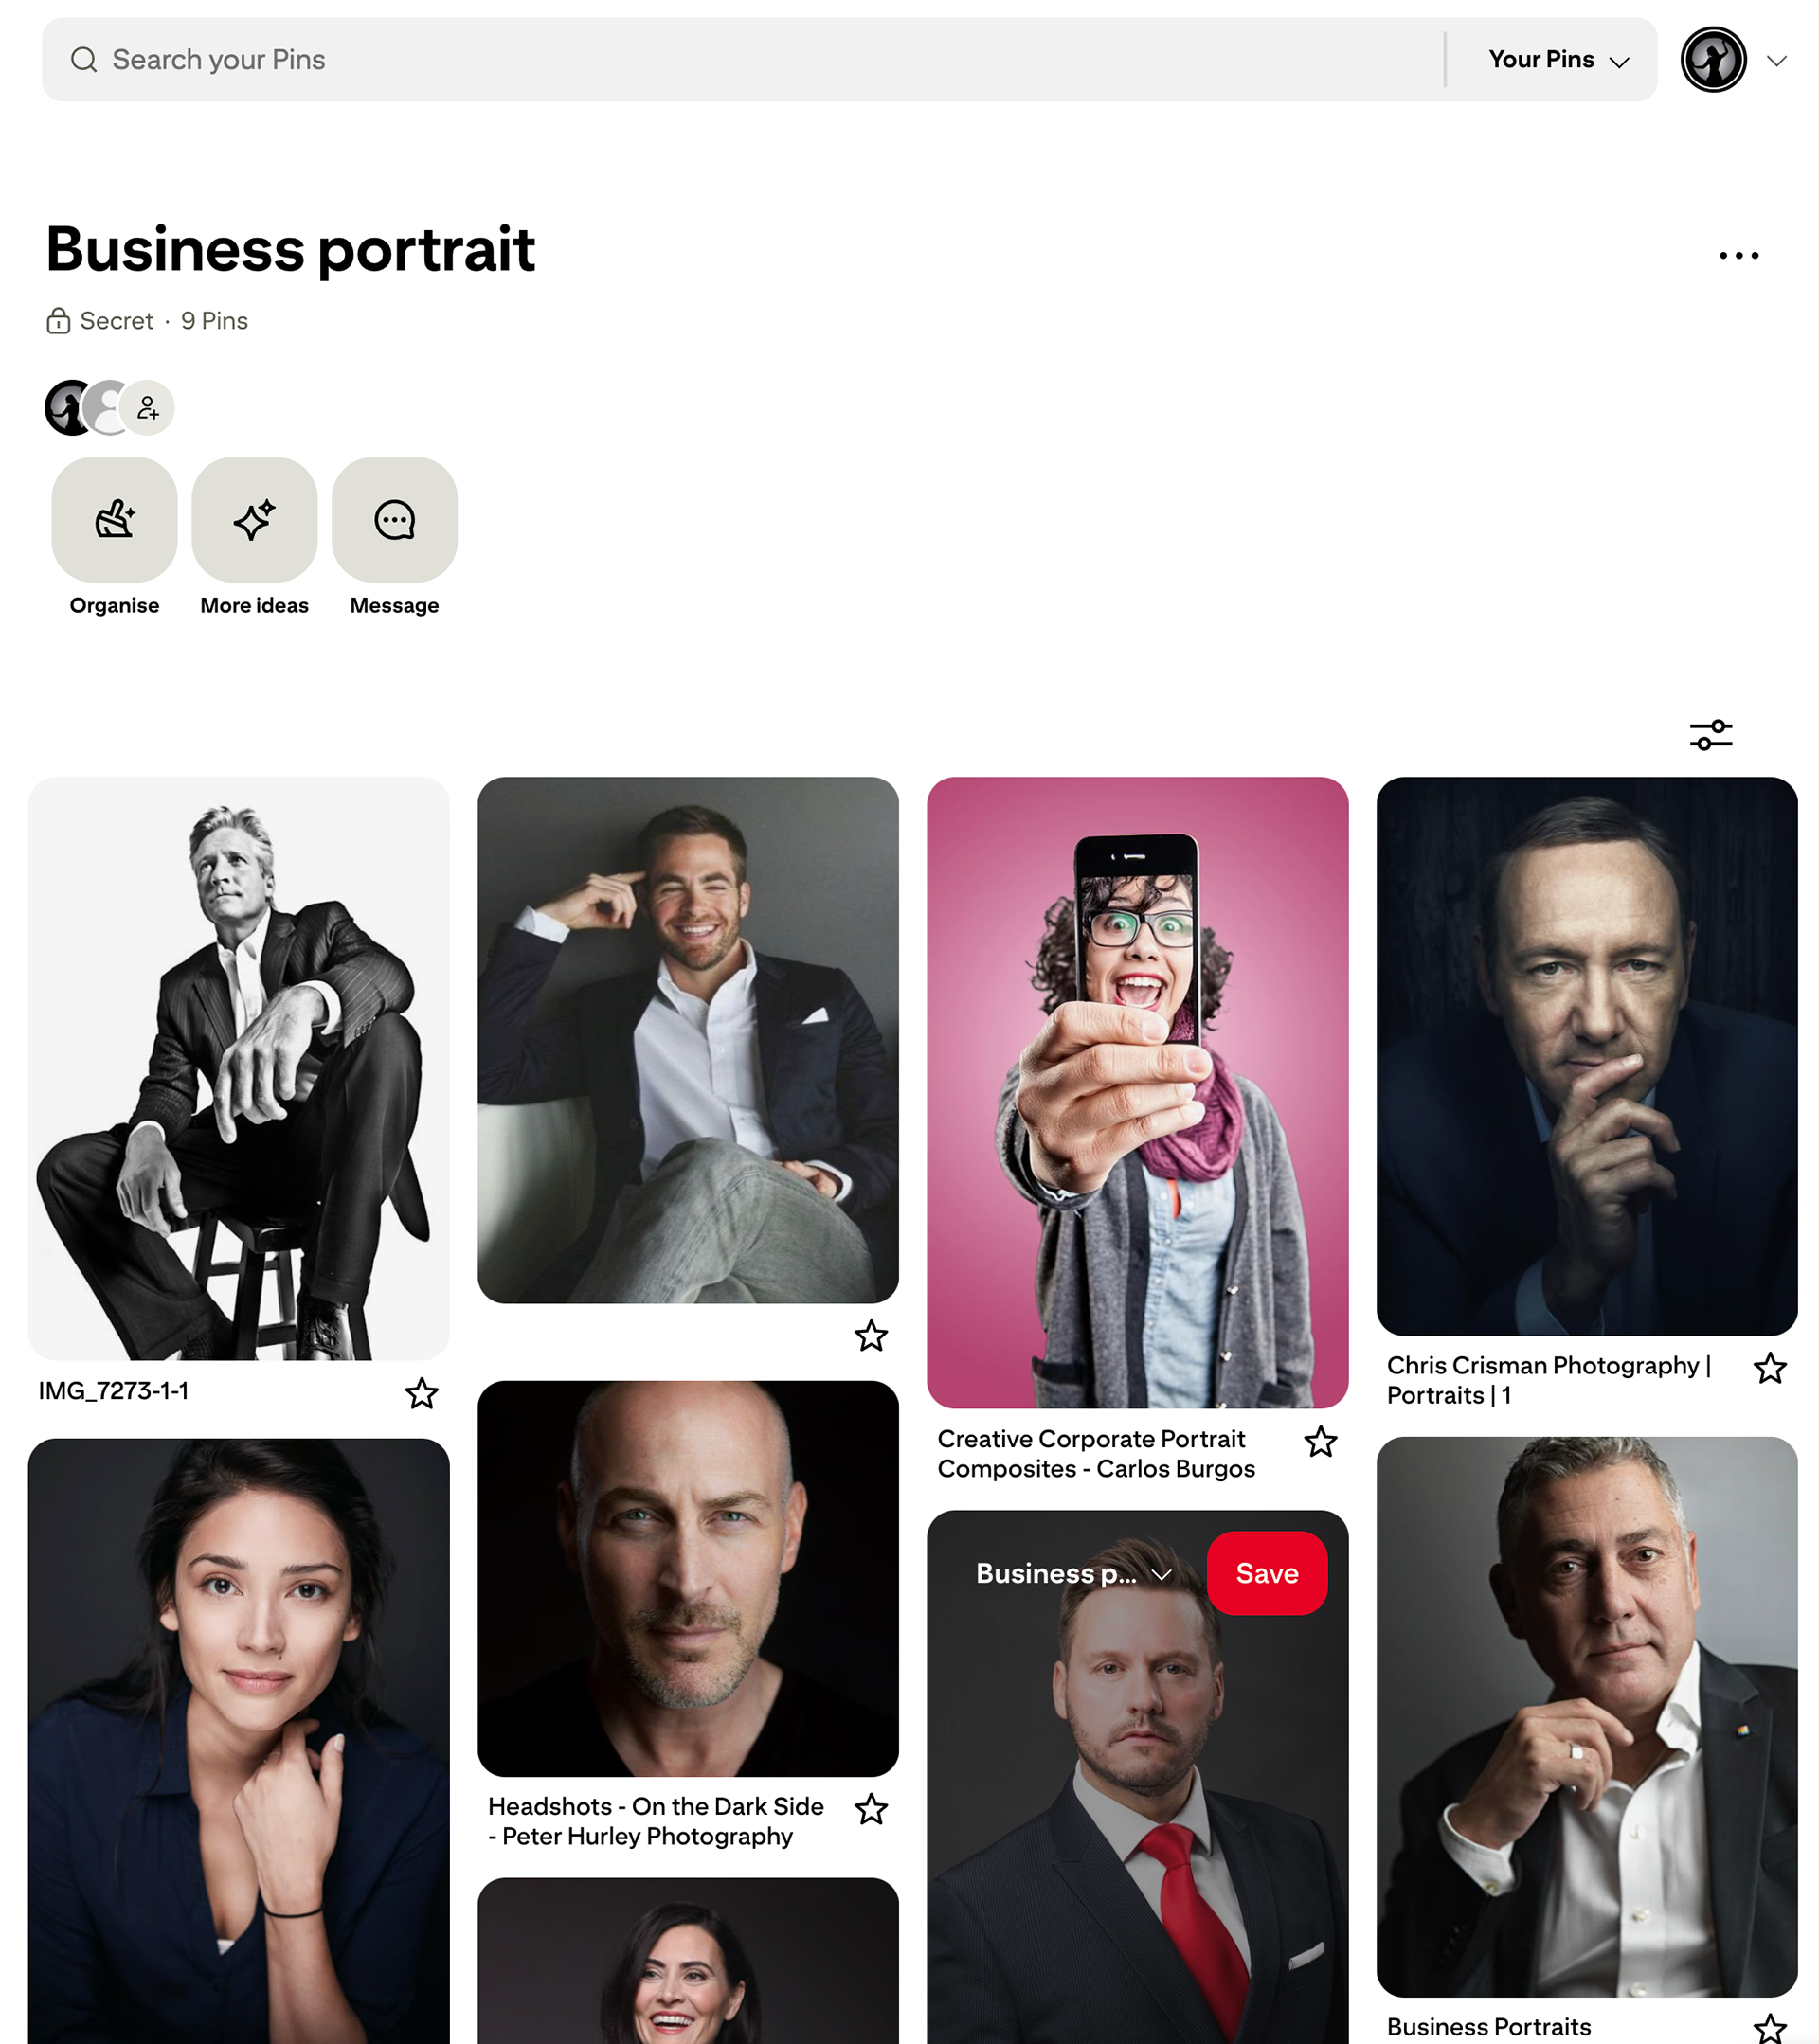
This is one of the two requirements before filling the form:
Create a Pinterest board (or any link) with examples of styles you like.
This helps me match the mood, the colors, the angles, the overall “feel” you’re going for.
Think of it as your moodboard. If you don’t give me one, I’ll use my best judgment — but don’t blame me if I put you in a three-piece suit when you were dreaming of hoodies and sneakers.
Please check that it is an open to view board, not a secret one.
No board? Create a google doc with examples and share that or link to any picture you like. But be aware, that if no examples provided, result could be not what you expect. I am not a mind reader unfortunately.
Step 4: Fill in the Onboarding Form
The form is where you tell me all the details:
Your brand info. Preferred styles. Colors, outfits, accessories.
Where these photos will be used (website, socials, presentations).
The form is editable after submission. You don’t need to stress about filling it all at once. You can come back later and add more details.
Step 5: Book an Onboarding Call (Optional, but Recommended)
Filling in the form is required. Booking a call is optional.
That said… I highly recommend it. Especially if this is your first time working with me. It’s a quick 15-minute call where we’ll go through your form together, I’ll ask questions, and you’ll get clarity on what to expect. It also helps me get to know you — and I like knowing the people I’m creating for.
Step 6: Sit Back and Let Me Work
Once I’ve got your form (and hopefully we’ve had our call), I’ll do my thing. I use multiple AI systems and my photographer’s eye to create branded photos that don’t look like cheap AI experiments. This is custom work, and it takes some precision.
Turnaround time: 2 business days. That’s it. You’ll get your photos fast, without the endless back-and-forth that usually comes with traditional shoots.
Step 7: Review Your Photos (and Video, if included)
You’ll receive your photos (and video, if it’s part of your package) to review.
Love them? Great. You’re done.
Want some tweaks? That’s included. You can ask for edits or style changes. I’ll adjust and send updated results.
Step 8: Final Delivery + Feedback
Once edits are done, you get your final set of images. Use them everywhere — website, social, email signatures, business cards, LinkedIn, Instagram reels, you name it.
And then, one last thing: tell me what you thought of the process. Your feedback helps me refine this and keeps me from losing my mind in AI chaos.
Final Word
This process is simple. I keep it that way on purpose. The only real work you have to do is:
Prepare your photos. Prepare your Pinterest board. Fill in the form.
That’s it. Everything else is me guiding AI like a camera and delivering results that make your brand look professional without draining your wallet or your patience.
So let’s get started. Watch the video, fill in the form, book a call if you want, and let’s create something that makes people look at your profile and say: “Damn, that looks good.”